A Beginner’s Guide to Joget Form Builder
Date
Oct 10, 25
Reading Time
8 Minutes
Category
Low-Code/No-Code Development
Share

When you build any business application with Joget, forms are usually where user input, data collection, and decisions begin. Behind every workflow, there’s a form that captures key information, drives actions, and connects to the data model.
The Form Builder in Joget is the visual tool for creating those forms. It’s drag-and-drop, but powerful it supports validations, bindings, Java logic, subforms, multi-page forms, data stores, and more.
Whether you’re a citizen developer or a technical engineer, mastering the Form Builder gives you control over user experience, data integrity, and workflow behavior.
In this guide, we’ll walk you through how to use Joget’s Form Builder, explain its features, show what to watch out for, and share best practices for forms that are robust, user-friendly, and integration-ready.
What is Joget form builder & why does it matter?
Joget’s Form Builder is a component in the Joget DX platform that allows users to visually design web forms for filling out during workflows. You use it to define which fields appear, how they behave, what data they store, and how they connect to external data stores.
Why it matters:
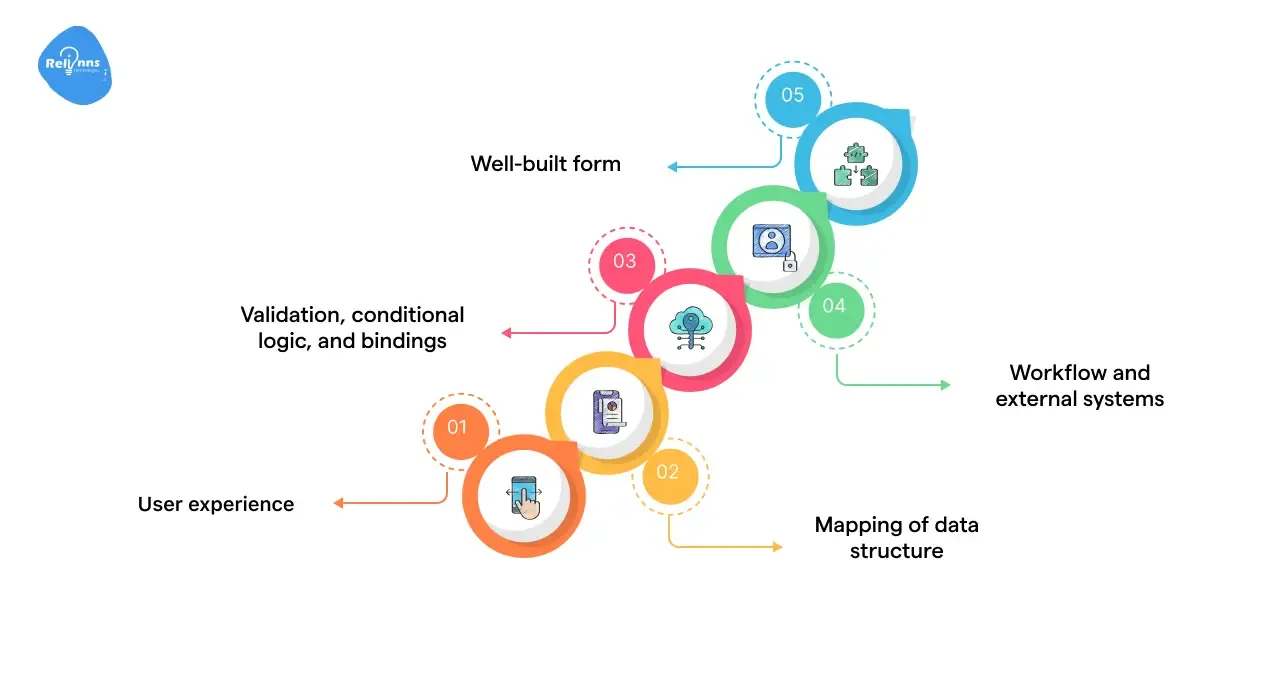
- It is defined that user experience forms that are confusing or slow will reduce adoption.
- It drives the mapping of data structure field IDs to database columns or data stores.
- It supports validation, conditional logic, and bindings, enabling the form to enforce rules.
- It integrates with workflow and external systems through data store bindings, subforms, and logic scripting.
- A well-built form reduces maintenance burdens and improves reliability in production.
Earlier versions of Joget also emphasized how critical the form has become:
“The most requested feature is not workflow… it is about forms.”
So this guide assumes that form design is central, not peripheral.
What are the key features & components of the Joget form builder?

Here are the essential building blocks and features you’ll use in Joget’s Form Builder, particularly in DX versions:
Palette & Search / Favorite
The Form Builder has a palette with all form elements (text fields, date pickers, file upload, subforms, grids, etc.). In DX 8, there’s a search box in the palette so you can quickly filter elements. Plus, you can mark favorites so your most-used elements appear at the top.
Property Editor & Searchable Properties
When you drag an element into the form, the property editor lets you configure its label, ID, validation rules, visibility conditions, and more. In DX 8, the property list is searchable, so you don’t have to scroll through dozens of settings.
Device Preview (Desktop / Tablet / Mobile)
You can view how the form will render on desktop, tablet, and mobile views, which is useful when many users will use phones. The builder supports toggling between these rendering modes.
Form Design Elements (Fields, Sections, Subforms, etc.)
Joget offers many types of form elements. Some form builder example:
- Text field, Text area, Number, Date picker, File upload
- Subforms / AJAX subforms – embed other forms inside, repeatable
- Advanced Grid, Form Grid – tabular or matrix layouts
- Hidden Field, ID generator field – for system data
- Custom HTML – to embed custom markup or UI bits
- Signature, Captcha, Rich Text Editor
- Validators – duplicate value check, directory validator, equal value, bean shell validator, etc.
Data Store / Binder Options
Fields do not always store in the default form table. You can bind them to:
- Database (JDBC / SQL query/wizard)
- JSON data store
- Directory/user store
- BeanShell script/custom logic
This lets you mix internal and external data sources.
Advanced Tools
These include features such as permission control on a field, tooltips (help text), and formula or calculation fields. In DX versions, permission and tooltip features moved to the “Advanced Tools” tab.
Save as Draft / Partial Validation
By default, a “Save as Draft” button just stores data without validating. But you can configure a custom button that validates the fields even when saving a draft. This helps ensure data quality early. There’s a known pattern in Joget’s documentation to do “Save as Draft with Validation.”
How to Build a Form Step by Step?
Creating a form in Joget DX is a straightforward process once you understand the logic behind its drag-and-drop builder. Whether you’re building a simple feedback form or a data-rich approval interface, the process follows the same flow.
Suggested Reading: How to Start Joget Development: A Complete Step-by-Step Guide
Let’s break it down into clear, beginner-friendly steps:
Step 1: Create a New Form
From your App Design page, click Create New Form.
Give your form:
- A unique ID (use lowercase, no spaces, e.g., employee_onboarding_form).
- A descriptive name that users will understand (e.g., Employee Onboarding Form).
- An optional table name if you want the form to store data in a specific database table.
If you’re new, let Joget auto-create a table for you. It will automatically map form fields to database columns behind the scenes.
Pro Tip:
If you plan to reuse this data across apps, keep the table name generic (e.g., employee_data instead of onboarding_employee_data).
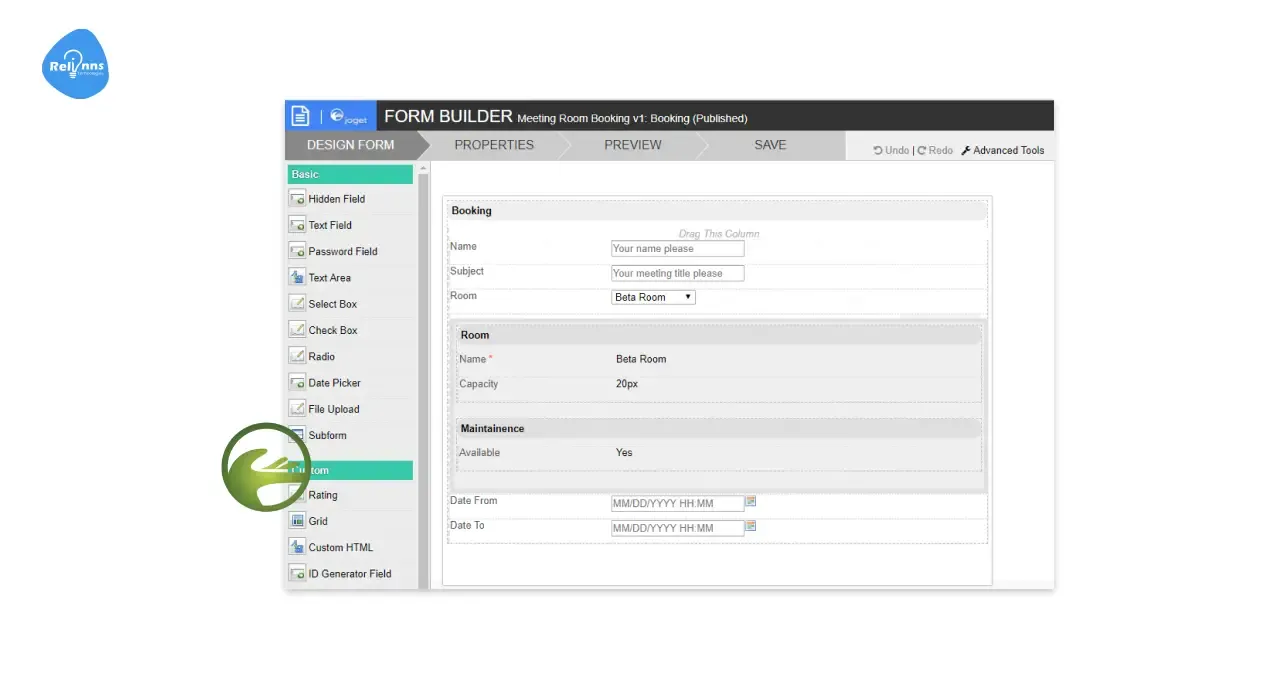
Step 2: Understand the Builder Interface
Once you open the form, you’ll enter the Form Builder interface.
Here’s what you’ll see:
- Canvas (main workspace): Where you design and arrange elements.
- Palette (left panel): Contains fields, layout components, and advanced form elements.
- Property Editor (right panel): Used to set labels, IDs, validations, conditions, and binders.
Joget’s interface is intuitive; you can drag any field onto the canvas and click it to open its settings in the property editor.
Pro Tip:
Use the search box in the palette to quickly find fields like “Date Picker” or “Subform” instead of scrolling through long lists.
Step 3: Add Sections and Layouts
Before adding fields, structure your form.
Joget lets you divide forms into sections and columns, which determine how your form looks and how information is grouped.
Example:
- Section 1: Personal Details (2 columns – Name, Email, Department)
- Section 2: Employment Info (single column – Role, Joining Date, Salary)
- Section 3: Attachments (single column – Resume, Offer Letter)
This structure ensures users don’t feel overwhelmed.
Pitfall to Avoid:
Avoid dumping all 20+ fields in one long column; break the form into logical groups for readability.
Step 4: Drag and Drop Elements
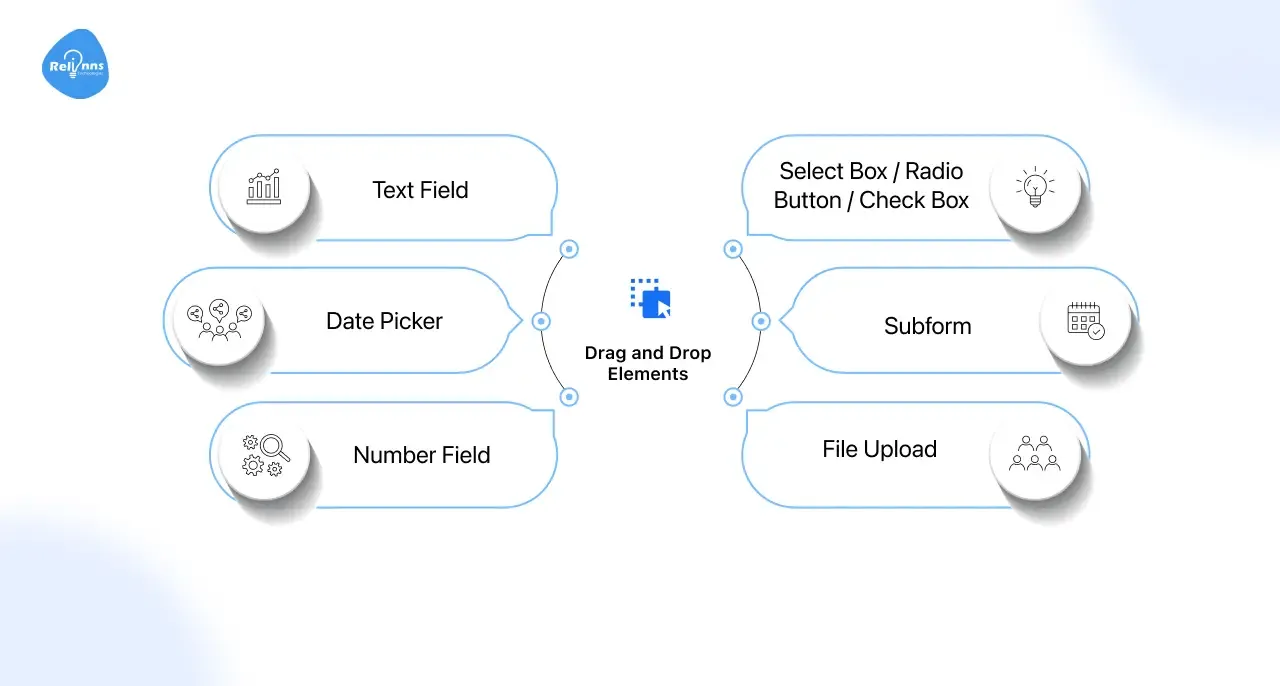
Now, drag fields from the palette into your sections:
- Text Field: For names, IDs, or titles.
- Date Picker: For joining dates or deadlines.
- Number Field: For numeric inputs like salary or quantity.
- Select Box / Radio Button / Check Box: For choices.
- Subform: For related child data like dependents or asset allocations.
- File Upload: For documents.
Joget automatically generates element IDs based on the label, but you can edit them manually in the property editor
Pro Tip:
Use Favorites in the palette for fields you use often (e.g., Text Field, Date Picker, Dropdown). Joget DX lets you mark and access them quickly.
Step 5: Configure Field Properties
Each form element has detailed settings you should review:
- Label: The name shown to users.
- ID: Internal system name (used in data binding and reporting).
- Validation Rules: Define required fields, format checks, or custom scripts.
- Default Value: Pre-fill with data from user profiles, APIs, or workflows.
- Visibility Rules: Hide or show based on other field values.
Example:
In an HR form, a “Resignation Date” field can be hidden until the “Employment Status” field equals “Resigned.”
Pro Tip:
Use the Property Editor search bar to find specific settings faster e.g., type “validation” to instantly jump to validation options.
Step 6: Bind Data to External Sources
Not all forms use internal Joget tables.
You can link (bind) form fields to external data sources using binders.
Binder types include:
- Form Data Binder (default): Stores data inside Joget.
- BeanShell Script Binder: Adds custom logic or transformation before saving.
- JSON / JDBC Binder: Fetches or writes to external APIs or SQL databases.
- User Directory Binder: Pulls user info from LDAP or directory services.
Example:
A “Department” dropdown can fetch values directly from an HR database instead of being manually typed.
Pitfall to Avoid:
If you change binders after production, ensure all existing data is migrated correctly otherwise, workflow steps that depend on field IDs may break.
Step 7: Add Conditional Logic and Calculations
Joget forms support visibility, validation, and calculated logic.
You can show/hide fields or sections based on another field’s value, or perform automatic calculations.
Example:
If “Expense Type = Travel”, then show “Destination” and “Transport Mode.”
Or use formula fields to compute totals like unit_price * quantity.
Pro Tip:
Use AJAX subforms for dynamic nested sections where a change in one field updates another without reloading the page.
Step 8: Preview and Test Responsiveness
Click Preview to check how your form looks across devices desktop, tablet, and mobile.
Joget’s Form Builder provides device simulation so you can fix layout issues early.
Ensure:
- Fields resize correctly.
- Buttons and file uploads are easily clickable.
- No element overflows or breaks alignment.
Pro Tip:
Use Joget’s multi-device preview to simulate real-world usage. Most business users fill forms on mobile.
Step 9: Save, Validate, and Deploy
Once your form passes testing:
- Save your form.
- Validate all fields to ensure no missing IDs or conflicts.
- Click Deploy App to push the form into your Joget environment.
You can now link the form to:
- A workflow process (approval, review, or escalation).
- A Userview menu item for direct access.
- An external link if it’s a standalone submission form.
Step 10: Test with Users and Iterate
Before rolling out fully, test the form with 3–5 real users.
Ask them:
- Was it easy to understand?
- Did you encounter any errors?
- Did it look good on your device?
Then refine based on feedback Joget makes iteration quick through its visual editor.
Pro Tip:
Create multiple versions (v1, v2) of the same form during testing. Joget’s versioning allows you to roll back safely if something breaks.
Step 11: Attach the Form to a Workflow or Userview
Forms on their own just collect data. Their real power emerges when attached to workflows or userviews.
- Workflow attachment: Use the form as an activity form in a Joget process e.g., “Leave Request Form” inside the Leave Approval flow.
- Userview menu: Publish it under a menu like “Submit a New Ticket.”
- Integration: Expose it via APIs for other systems to submit data.
Example:
In a Customer Feedback Process, the same form used for data entry can later be displayed in read-only mode during the “Review” stage.
Step 12: Manage Form Versions and Upgrades
Every time you modify a form, Joget automatically increments its version.
Older versions remain intact, which ensures live workflows continue unaffected.
Pro Tip:
Before major changes, duplicate the form and use versioning as your safety net.
Step 13: Monitor Form Submissions
After deployment, monitor your form’s data health using Joget’s built-in analytics.
Check for:
- Missing or invalid data entries
- Common user errors
- SLA delays linked to specific forms
Over time, these insights help refine design and improve performance.
Mini Case Study: Employee Onboarding Form
A company using Joget DX built an onboarding form with:
- Dynamic sections for job role, department, and assets.
- File uploads for resumes and offer letters.
- An automated email was sent to HR when the form was submitted.
By applying conditional visibility, the form remained under 10 visible fields at any time making it simple and mobile-friendly. The onboarding process completion time dropped from 3 days to 1 day.
What are the best practices for Joget form design?
To help your forms stay maintainable, usable, and scalable:
- Use meaningful ID naming conventions (snake_case or camelCase) – the ID often becomes a column name.
- Avoid reserved IDs like appId, version, menuId, etc. Those IDs are handled by the Joget core.
- Keep sections and fields minimal: only show what is needed for that step.
- Wherever possible, use visibility conditions so fields indicate only in relevant contexts.
- Validate early: use validators (duplicate, equal, directory) so bad data is caught before workflow steps.
- Use multi-page (multipaged) forms when a long form is too heavy on one page.
- For repeating data (like multiple address lines or item entries), use subforms/grids.
- Document which elements are bound to external sources or logic (e.g. custom JSON binder).
- When upgrading forms, maintain backward compatibility where possible (don’t rename IDs casually).
Conclusion
Joget’s Form Builder is more than a simple form designer. It’s a core component that determines data integrity, user experience, and connectivity with workflows and external systems.
A well-designed form will reduce errors, speed approvals, and embed flexibility in your application.
If you want expert support to build production-grade forms with validation, conditional logic, integration, and scalability, we’d love to help.
Frequently Asked Questions (FAQ's)
What is Joget Form Builder used for?
Joget Form Builder lets you design web forms visually without code. You can drag and drop fields, add validations, bind data sources, and link forms to workflows, creating fully functional, database-backed business forms quickly.
Can I connect Joget forms to external databases or APIs?
Yes. Joget supports JSON, JDBC, and BeanShell binders that let you connect forms to external SQL databases or APIs. This allows you to fetch or store data in real-time and build apps that integrate seamlessly with existing systems.
How do I validate user input in Joget forms?
You can use built-in validators like Duplicate Value, Equal Value, or Directory Validator, or even add custom BeanShell validation scripts. These rules help prevent bad data before it enters your workflow or database.
What happens if I change a field ID after deploying a form?
Changing field IDs post-deployment may break workflows or data bindings because Joget uses IDs as database columns. Always create new fields or version your form instead of renaming production field IDs.
How do I reuse a Joget form in multiple workflows?
Simply associate the same form with multiple process activities or userviews. Joget allows a single form to serve different use cases by adjusting visibility rules or field configurations for each context.
Which is the best form builder?
If you’re building workflow-driven business apps, Joget Form Builder is one of the best. It combines low-code flexibility, workflow integration, and enterprise-grade scalabilityideal for both citizen developers and IT teams.