How to Set Up JSON API Integration Using Joget
Date
Jul 08, 25
Reading Time
18 Minutes
Category
Low-Code/No-Code Development
Share
Modern businesses rely on multiple applications, and without seamless integration, data silos and inefficiencies quickly emerge. JSON API integration solves this by allowing different systems to exchange information in a lightweight, standardized format.
With Joget’s JSON API integration, organizations can easily connect their apps to external services, automate workflows, and eliminate manual data transfers. This makes it easier to unify operations and maintain consistent, reliable data across platforms.
In this blog, we’ll walk you through how to set up JSON API integration in Joget, covering prerequisites, configuration steps, real-world examples, troubleshooting tips, and best practices.
What is JSON API Integration?
JSON API integration refers to connecting two software systems so they can exchange data in the JSON format. JSON stands for JavaScript Object Notation, and it has become the de facto standard for web data exchange because it’s human-readable and easy for machines to parse.
In integration terms, a “JSON API” usually means a web service endpoint that accepts requests and returns responses in JSON. When we integrate such an API with Joget, we enable Joget to send data to external services and fetch data from them using JSON messages, facilitating seamless External Service Integration.
To illustrate, think of everyday examples powered by JSON APIs
- A weather widget that displays live forecasts is calling a weather service’s JSON API.
- A travel site showing flight prices is pulling data via JSON API calls to airline systems.
- Even logging in with Google or Facebook uses JSON API requests behind the scenes.
In all these cases, JSON acts as a common language for different apps to talk to each other.
Joget leverages JSON APIs because they offer several key benefits
- Universal compatibility across different platforms and programming languages.
- Structured data that’s easy to parse and generate programmatically.
- Smaller payload size than XML for faster data transfers over the network.
- Flexibility to represent complex data structures and nested information.
- Wide adoption in modern web services, making integration widely feasible.
By using JSON API integration in Joget, you can connect your app to any service that exposes a RESTful API.
This means your Joget app isn’t limited to its built-in features it can tap into external functionalities like sending SMS via Twilio, posting updates to Slack, pulling data from Salesforce, or any other service with a web API.
In short, JSON API integration serves as the bridge that enables Joget to communicate with the outside world in real-time, facilitating External Service Integration and making it essential for building feature-rich, connected applications.
Understanding Joget’s API Plugin
Joget makes integrations easier through its built-in API plugin (often called the JSON API plugin or JSON Tool). This plugin acts as the bridge between your Joget application and external web services.
Instead of writing complex code to call an external API, you configure the plugin with the details of the API, and Joget handles the communication for you.
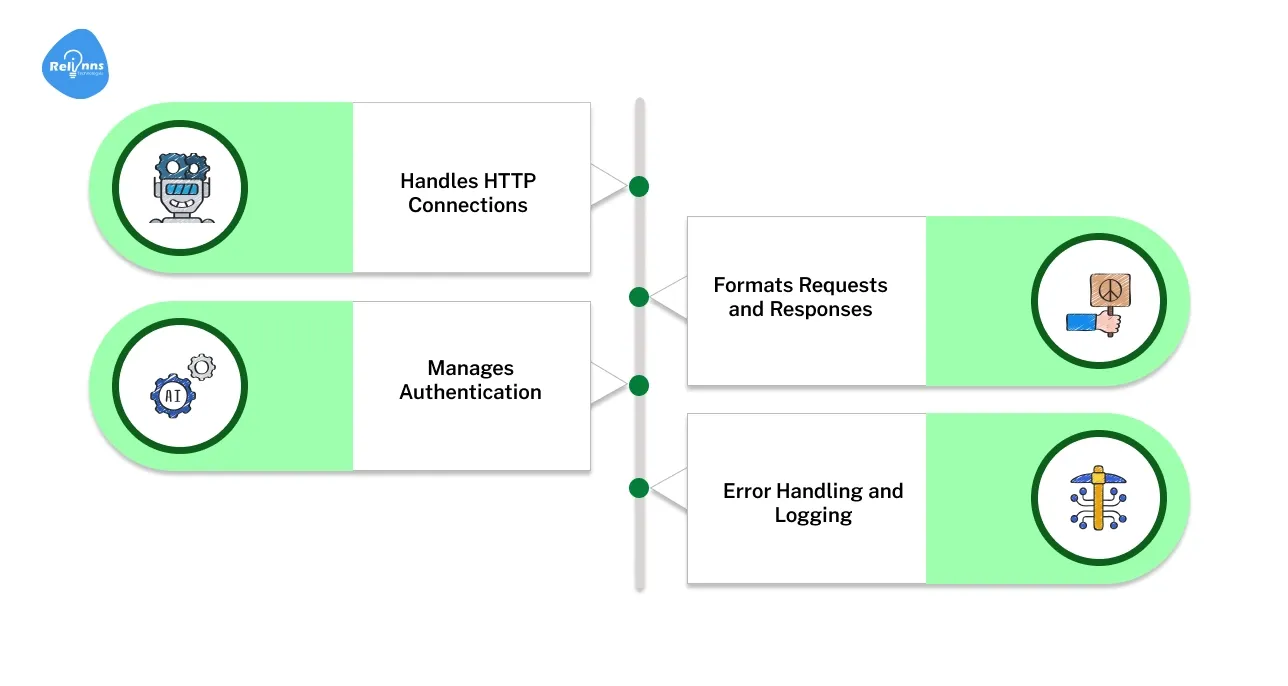
Let’s break down what the Joget API plugin does and why it’s important?
- Handles HTTP Connections: The plugin can send HTTP requests (GET, POST, PUT, DELETE, etc.) from Joget to an external API endpoint. It takes care of forming the request URL and sending the data out.
- Manages Authentication: Many APIs are secured and require authentication (like API keys, tokens, or OAuth). Joget’s API plugin supports various authentication methods, so you can securely connect to APIs.
- Formats Requests and Responses: The JSON API plugin formats the data you send according to JSON standards. You can map Joget form fields or workflow variables into a JSON structure for the request.
- Error Handling and Logging: The plugin can detect if something went wrong. You can configure it to handle errors gracefully—maybe set a flag, send an error message to the user, or log the details for debugging.
How does data flow with the API plugin?
Imagine a user submits a form in Joget that triggers an API call. Here’s the basic flow.
- The Joget form or process triggers the API plugin (for instance, a form button is clicked or a workflow reaches a tool node configured as an API call).
- The API plugin reads your configuration and prepares a JSON request. It will include any data from Joget (form fields, etc.) that you mapped into the request.
- Joget sends the HTTP request out to the external system’s JSON API.
- The external system processes it and sends back a JSON response (e.g. data or a success message).
- Joget’s API plugin receives the response. It can map parts of the JSON (like specific fields) back into Joget’s workflow variables or form fields.
- The Joget app can then use this response data for example, display it to the user, save it in a form, or make decisions in a workflow.
Behind the scenes, Joget’s JSON API integration uses these plugins and tools to handle External Service Integration, so you, as the app designer, don’t have to write raw code for each API call.
Understanding this plugin’s role is key: it’s the workhorse that translates Joget’s low-code configuration into actual API calls and handles the returned data. Next, we’ll ensure you have everything ready to start using it.
What are the prerequisites before starting JSON API integration in Joget?
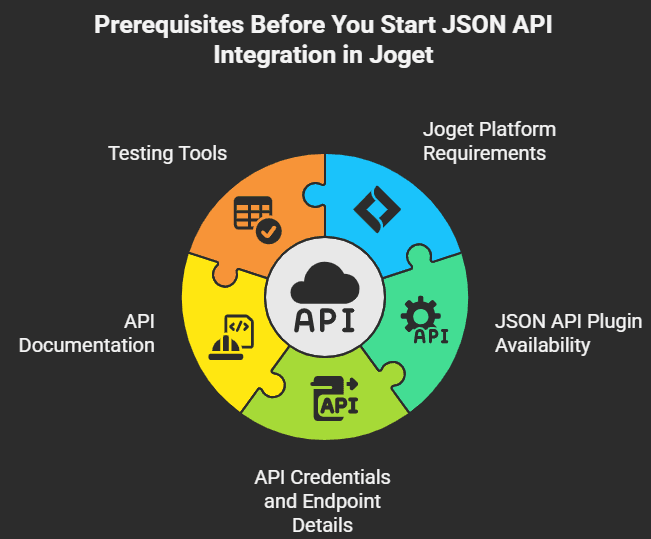
Before diving into configuring a JSON API integration in Joget, make sure you have a few prerequisites in place. Proper preparation will save time and help avoid common setup issues.
Joget Platform Requirements
- Ensure you have a compatible Joget version. Joget DX (Joget version 6 or above) is recommended for robust API capabilities.
- For best results, use the latest version (e.g., Joget DX 8 as of now), since it offers enhanced JSON handling and more integration features.
- Earlier versions might not have the JSON API plugin readily available or might have fewer features.
JSON API Plugin Availability
- Verify that the JSON API plugin (also known as the JSON Tool or API Tool) is installed in your Joget environment.
- In many cases, this plugin comes pre-installed with Joget. To check, go to your Joget dashboard, navigate to System Settings -> Manage Plugins, and see if an “API” or “JSON Tool” plugin is listed.
- You can download the plugin from the official Joget Marketplace and upload it via the plugin manager. Always use the version that matches your Joget version.
API Credentials and Endpoint Details
- Identify the external system’s API you plan to integrate with.
- You’ll need the API endpoint URL and any required parameters.
- If the API requires authentication, obtain the necessary credentials beforehand.
- This could be an API key, a token, or a username/password.
API Documentation
- Have the documentation of the target JSON API handy.
- It’s important to know what format of requests the API expects and what the responses look like.
- The docs will also tell you if there are specific endpoints for different actions.
- For instance, a CRM API might have one endpoint for creating a contact and another for retrieving contact details.
Testing Tools
- It’s highly recommended to have an API testing tool such as Postman or cURL ready.
- Before plugging everything into Joget, you might want to test the API calls independently.
- With Postman, for example, you can simulate the JSON API request to see if you get a valid response.
- Additionally, if something isn’t working in Joget, you can use these tools to troubleshoot whether the issue lies with the API or with your Joget configuration.
By ensuring these prerequisites a correct Joget version, a plugin installed, having an API endpoint and keys, documentation, and testing tools you set yourself up for a smooth integration process.
Now, with preparation done, let’s move on to the actual steps of setting up the JSON API integration in Joget.
What are the step-by-step instructions for setting up JSON API integration in Joget?
Now we get to the core of the blog: configuring a JSON API integration in Joget from scratch. We will go through it step-by-step.
Each step builds on the previous, so follow along in order. Before you begin, log in to your Joget platform with an account that has design privileges (usually an administrator or developer role) to configure JSON API and External Service Integration settings effectively.
Step 1: Create a new app (or choose an existing one)
First, decide where this integration will live. In Joget, all elements (forms, processes, etc.) are organized within an “App”. You can use an existing app if it fits your needs, or create a new one dedicated to this integration.
If you opt to create a new app for a clean setup
- Log in to Joget and navigate to the App Center (also called App Builder or App Designer). This is where all your Joget applications are listed.
- Click on “Design New App” (in some versions, a “+ Create App” button). Provide a name and an optional description for your app. For example, “API Integration Demo” could be the name. The app ID will be generated (or you can set one).
- Once created, the app will appear in your list. Click on it to enter the App Builder. Here you can manage forms, processes, userviews, etc., for this app.
- Set up basic app properties and permissions if needed. For example, ensure you have access to run the app or consider who will use this app and give them the necessary permissions.
If you’re using an existing app, just open that app in the App Builder.
The key is that you have an app context to work in because the forms and process tools (like the JSON API plugin) will be configured within this app.
Having a logically separated app for integration testing can be helpful so as not to disturb any production application until you’re ready. For our example ahead, we’ll assume you have an app ready to go.
Step 2: Build a form or workflow for the integration
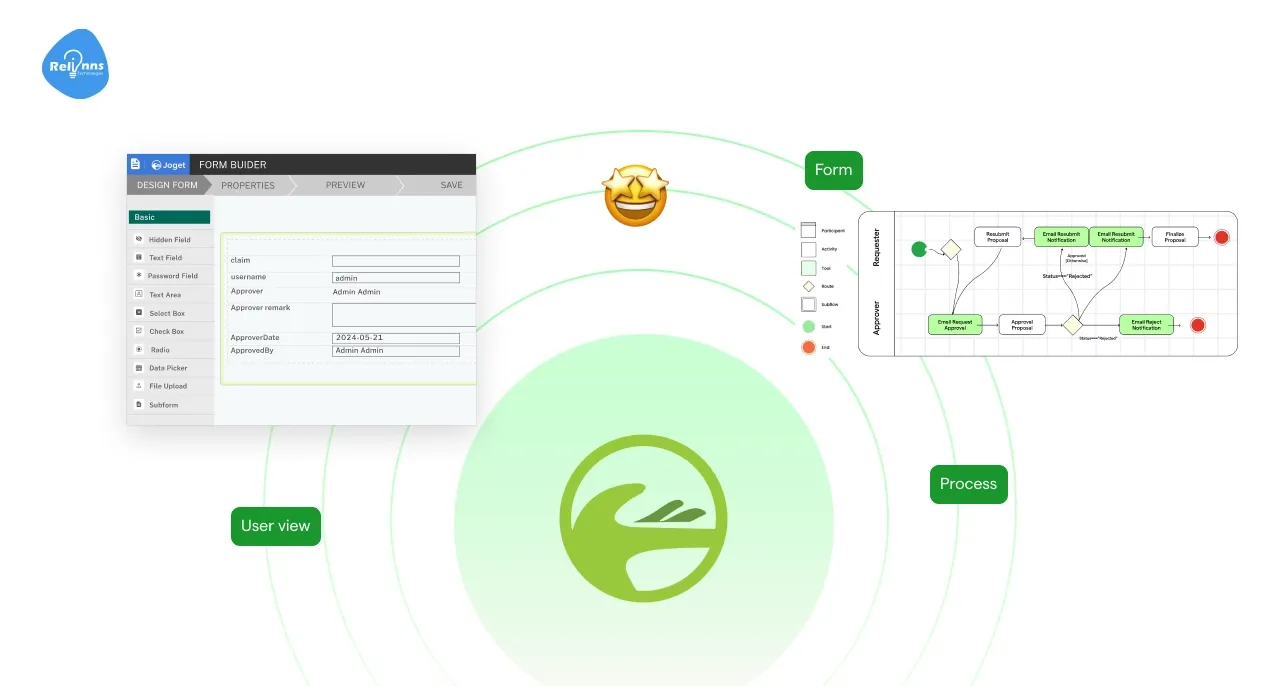
Next, determine how you want Joget to trigger the JSON API call and what you want to do with the data.
Most commonly, you’ll either trigger the API from a form (e.g., when a user clicks a button or submits a form) or from a workflow process (e.g., an automated step in a business process).
You should create the form or process before configuring the API tool, so you have something to attach the integration to and fields to map.
If using a form to trigger the JSON API:
- In your Joget app, go to the Form Builder and design a form that will either send data to the API or display data from the API (or both). If you are sending data, your form might collect user input that will be sent out via the API.
- Add all necessary fields. Ensure each form field has a unique field ID. These IDs will be used later to map data to JSON. For example, create a form with a field for “Customer ID” and fields for “Customer Name” and “Customer Status”.
- Optionally, add a button or integrate the form with a process if needed to trigger the API call. Joget forms can have a Button element that is tied to a process tool. This means when the button is clicked, it can execute a process flow that includes the API call.
If using a workflow process to trigger the JSON API
- Go to the Process Builder for your app. Design a process diagram that includes a step for the API call. Typically, you might have a start event, some activity, and then a “tool” that calls the API, followed by other steps.
- Add a Tool element where you want the API call to occur. Name it something like “Call JSON API”. You will later configure this tool to use the JSON API plugin.
- Connect the process flow. Ensure the process has all the context it needs for instance, if the API needs data from a form, that form should be part of the process and the data should be passed as process variables.
Whether you choose a form-based trigger or a workflow-based trigger, make sure you know which Joget fields or variables will be involved.
Essentially, identify: What data do I need to send out? and What data do I expect to get back? Having a clear picture of this will make configuration much easier in the next steps.
Step 3: Configure the JSON API plugin (Connection Details)
This step is the heart of the integration, setting up Joget’s JSON API plugin to connect to your target API. We will configure the endpoint, method, headers, and authentication in this part.
Locate where to add the JSON API tool, based on your approach in Step 2
- If you are using a workflow process: open the Process Builder, click on the tool element you added, and in its properties, choose “Plugin” as the type of tool.
- Then select the JSON Tool / JSON API plugin from the list of available plugins. This will open a configuration dialog specific to the JSON API tool.
- If you are triggering from a form’s post-processing, go to the Form Builder, click on the form properties or the specific button’s action, and set it to use the JSON API plugin as a form tool. The configuration interface will be similar.
Suggested Reading: The Complete Guide to Outsource Software Development for Joget
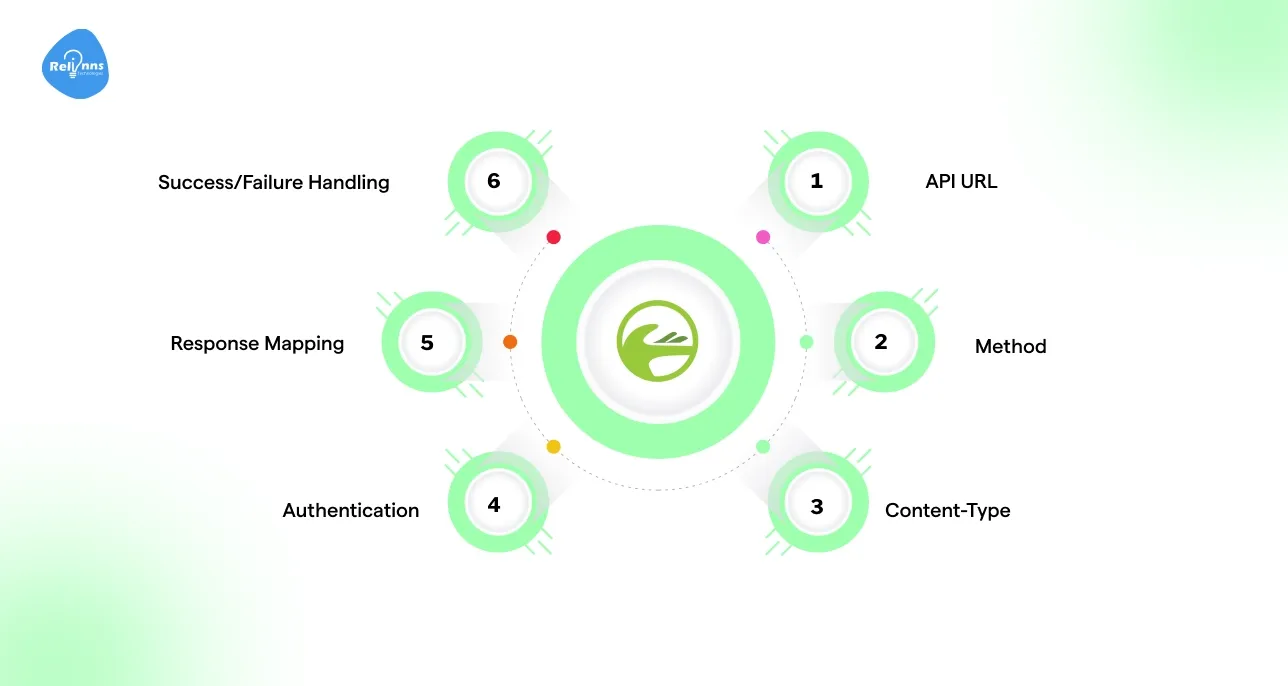
In the JSON API plugin configuration screen, fill out the essential fields as follows
- API URL
- Enter the full endpoint URL of the JSON API you want to call. This might include path parameters or query parameters as needed.
- For example, if the API is https://api.example.com/v1/customers and you want to retrieve a customer by ID you might have something like https://api.example.com/v1/customers/#customerId# where #customerId# will be replaced by a Joget field or variable at runtime (we’ll cover mapping in the next step).
- Make sure the URL is correct and complete.
- HTTP Method
- Select the method required by the API common ones are GET (to retrieve data), POST (to create data), PUT or PATCH (to update data), or DELETE (to remove data).
- Choose the one that matches the action you intend. For example, retrieving data is usually a GET request, while sending new data might be a POST.
- Content Type
- Since we are dealing with JSON, set the content type to application/json.
- This tells the external API that our request body (if any) will be in JSON format.
- Accept
- Also set this to application/json. This tells the API that we expect a JSON response.
- In most cases the API will return JSON by default, but it’s good practice to specify it.
- Request Body/Parameters Type
- In the plugin, you might see an option for how to send parameters (depending on Joget version).
- Choose JSON (or “Raw JSON”) if you will send a JSON payload in the request body.
- If you are doing a GET with query params, you might not need a JSON body at all in that case this might not be heavily used.
- Authentication: Configure the appropriate authentication method
- No auth: If the API is public or doesn’t require auth (like a test API), you can leave this blank.
- API Key in Header: Many APIs require a key. Often you include it as a header. In the Joget plugin, there is typically a place to add custom HTTP headers.
- Basic Authentication: If the API uses basic auth (username and password), the plugin interface might have fields for Username and Password. Joget will handle encoding them into a Basic auth header.
- OAuth 2.0: This is more complex if the API uses OAuth, you might need to obtain a token first. Some Joget plugins might support an OAuth flow or you might have to call a token endpoint as a separate API call.
- Headers
- Besides authentication, if the API requires any other HTTP headers, you can configure them.
- The plugin typically includes a section for adding multiple headers.
- Timeout and Retries (if available)
- Some versions of the plugin allow you to set a timeout (in seconds). If the API doesn’t respond within that time, the call fails.
- Also, consider if you want Joget to retry the call on failure (this may require custom handling).
Double-check all the values. A small typo in the URL or a missing header can cause the call to fail.
A best practice is to test the API in Postman with the exact details to confirm it works, then mirror those settings in Joget. Once the connection details are in place, we’ll move to mapping data.
Suggested Reading: Top Joget Plugins Every Developer Should Know
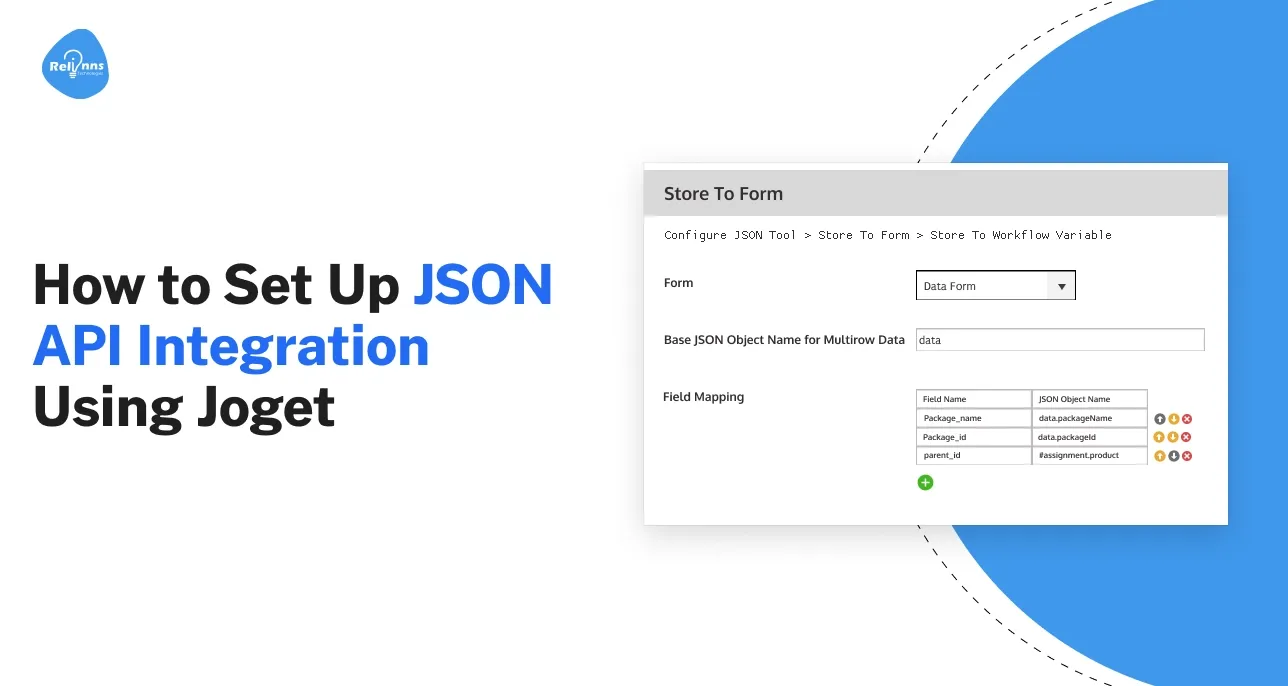
Step 4: Map Joget fields to JSON fields
Mapping involves connecting the data from your Joget form or workflow to the JSON request, and vice versa for the response.
- Essentially, you’ll tell Joget which parts of your form/process data should go into the JSON request body or parameters, and how to pull values from the JSON response back into Joget.
- In the JSON API plugin configuration, look for sections or tabs related to Request Parameters/Body and Response Mappings (terminology might vary slightly by Joget version or plugin UI).
- Mapping Request Data (Sending data out)
- If your API call requires a JSON request body, you need to construct that JSON with Joget’s data.
- Joget will typically let you define the JSON structure in a text area or through a key-value interface.
Step 5: Set up success and error handling
Integrations can sometimes fail or return unexpected data, so it’s important to configure how your Joget app handles success versus error scenarios.
The JSON API plugin in Joget provides ways to manage this.
- Success Handling: On a successful API call (for example, you get a 200 OK response with the expected JSON), you might want Joget to take certain actions.
- Error Handling: APIs can fail for numerous reasons invalid input, server issues, timeouts, etc. You should plan for these so the user isn’t left hanging or so your workflow doesn’t get stuck.
Joget’s JSON API plugin typically has an “Error path” or similar configuration: for example, in a process, the tool could have an alternate transition if the plugin throws an error. You can use this to catch errors and handle them. If available, do the following
- Define an error transition in the process: In the Process Builder, after the JSON API tool, draw one outgoing line for success (often default) and another for error. The plugin might let you name the error transition.
- Log the error: Ensure you enable logging for debugging. Joget will usually log the error message from the API. This appears in the server logs.
- User feedback on forms: If the API call was user-initiated, you should inform the user if something went wrong. You might use a notification or validation message on the form.
- Timeouts: If your API calls might sometimes time out, you should consider that in your user experience. Joget’s default timeout might cause the process to error.
In summary, configure your Joget integration such that: successful calls proceed smoothly and use the data, and errors are caught to either try an alternative or at least inform the user.
With the integration configured and handling in place, it’s time to test everything end-to-end.
Step 6: Test your integration
Testing is a critical step. Even with careful setup, integrations often need debugging. Joget provides ways to test within the design environment, and you should also do some live tests as a user.
Here’s a checklist for testing your JSON API integration in Joget
- Use Joget’s Built-in Test (if available): Some versions of the JSON Tool plugin have a “Test” button in the configuration dialog. This allows you to input some sample values (for the mapped fields) and execute the API call right from the designer. Use this to do a quick check.
- Run Through the App UI: Go to the runtime view of your Joget app (usually by clicking the play icon or accessing the userview if one is set up). Use the form or process as an end user would.
- Do you get the expected result populating in the form fields?
- If in a process, did the workflow complete the API step and move on? Check any output variables or the next task to see if things went as planned.
- If you set up a success message or redirect, did it occur?
- Check the Logs for Errors: If something didn’t work, immediately check Joget’s logs. On Joget, if you have access to the server logs or the system logs, look for error entries around the time you tested.
- Common testing pitfalls:
- Authentication issues: Double-check that your credentials are correct and that they are being sent properly. If using a key, ensure it’s in the right header and format. A frequent mistake is forgetting a prefix like “Bearer ” before a token if the API expects that.
- Data not mapping: If your API call succeeded (no error), but Joget fields are not populated, the JSON path expressions might not match the response structure. Use a tool like Postman to see the raw JSON coming back. Then adjust your mapping paths.
- Form issues: If using a form, make sure the fields that display results are set to read-only if the user shouldn’t edit them, and possibly marked to be visible after submission. If they are hidden or only in the form initially, you might need to tweak the form design to show the results.
- Multiple tests: Try different scenarios. If your API takes an input parameter, test with valid and invalid inputs (e.g., a customer ID that exists versus one that doesn’t). Ensure your error handling covers the “not found” case gracefully.
- Performance: If possible, test how long the call takes. If it’s a few seconds, that’s usually fine; if it’s much longer, consider whether the user will wait or if you need to optimize or inform them.
Keep iterating on your configuration based on test results. It’s normal to adjust the JSON mappings or tweak field settings a couple of times until everything lines up perfectly.
Once your test shows that the Joget app successfully calls the JSON API and handles the response properly, congratulations you have set up a working JSON API integration in Joget!
What is a practical example of connecting Joget to a public JSON API?
To solidify the concepts, let’s walk through a concrete example: integrating Joget with a simple public JSON API. We’ll use the JSONPlaceholder API, which is a free fake online REST API useful for testing and prototyping.
Specifically, we’ll retrieve a “to-do” item by ID from JSONPlaceholder and display it in a Joget form. This example will show how all the pieces come together in a real scenario.
- Scenario: We have a Joget app where users can enter a Todo ID and click a button to fetch the todo’s details (title and completion status) from JSONPlaceholder.
We want to display the title and completed status in our Joget form.
Step A: Form design

In Joget, create a form called “Todo Lookup Form” (within an app). Add the following fields
- Todo ID: Text Field or Number Field where the user will input the ID of the todo they want to fetch. Field ID could be todoId.
- Title: Text Field (set as read-only) to display the title fetched from the API. Field ID todoTitle.
- Completed: A Checkbox or a Select Box (read-only) to display the completed status (true/false) fetched from the API. Field ID todoCompleted.
- Fetch Button: Button element that will trigger the API call. In the Form Builder, add a Button and label it “Fetch Todo”. For its action, configure it to run Process.
Step B: Process design
Design a simple process “Fetch Todo Process” with the following
- Start -> Tool -> End.
- The Tool in the middle will be our JSON API call. Set this tool to use the JSON API plugin.
- In the process, map the form fields into process variables. For example, a process variable todoId will carry the value from the form field todoId when the process starts.
Step C: JSON API plugin configuration
Configure the JSON API tool in the process with
- API URL: Here, #todoId# will be replaced by the value from the Joget form.
- Method: GET (we are retrieving data).
- Content-Type: application/json, Accept: application/json.
- Authentication: None (JSONPlaceholder is public, no auth needed).
- No request body is needed for this GET, since the ID is passed in the URL. So we won’t add a JSON body.
- Response Mapping: We map the JSON response to our form fields.
- Success/Failure Handling: Since this is a simple example, we might not have an alternate path for error in the process. But we can still handle it in user interface.
Step D: Running the Example
Now, publish the app and navigate to the Todo Lookup Form in the userview.
Enter a number (for example, 1) in the Todo ID field. Click the Fetch Todo button.
Behind the scenes, Joget will start the process, and the JSON API plugin will call https://jsonplaceholder.typicode.com/todos/1.
- What a successful test looks like: The user stays on the form and sees the Title and Completed fields populate with data fetched from the external API. There was no page reload (if configured via an AJAX-submission, Joget can do it dynamically, or it might reload the form with the data).
Always test with sample data like we did here to ensure your mappings and settings are correct before rolling out to production.
Suggested Reading:
How to Reduce Development Costs Using Joget
What are the common issues in JSON API integration with Joget and how to fix them?
Even with careful setup, you might encounter some issues when implementing JSON API and External Service Integrations in Joget. Don’t worry—this is normal in integration projects.
Here are some common issues and how to troubleshoot or fix them.
Authentication errors (401 unauthorized or 403 forbidden):
If the API returns a 401/403 status, it means authentication failed or you don’t have permission.
- Double-check your credentials. For API keys, ensure you placed the key in the correct header or parameter as required.
- If using OAuth tokens, verify that the token is current and has not expired.
- A quick fix is to test the call in Postman with the same auth details.
- If it fails there, the issue is with credentials or access rights.
- Sometimes, you might need to whitelist your Joget server’s IP on the API side.
- Also, ensure you enabled HTTPS and you’re hitting the correct environment.
Incorrect JSON mapping (Field mismatch):
Suppose the API call succeeds (no error code) but the data you expect isn’t showing up in Joget fields. This usually indicates a mapping issue.
- Maybe the JSON path you provided doesn’t match the actual response structure.
- Use a sample response and verify the JSON paths.
- Tools like JSON path testers or simply looking at the raw JSON and identifying keys help here.
- Also, check that the Joget field IDs in your mapping are correct.
- It’s easy to accidentally use the wrong field ID or variable name.
- Remember that JSON is case-sensitive, so “Status” vs “status” matters in the path.
Time-outs and slow responses:
If Joget reports a timeout or the user experience is that nothing happens for a long time, the API might be slow or unreachable.
- Verify the endpoint URL (if it’s wrong, the request might hang until timeout).
- If the endpoint is correct but slow, maybe the API provider is having issues.
- You can increase the timeout setting in Joget’s plugin configuration to give it more time, but this is only a band-aid.
- Long waits degrade UX. If possible, find out why it’s slow network issues, large data volume, etc.
- For large data, you might consider if the API supports pagination or filtering to limit data per call.
- It might be better to retrieve smaller chunks rather than one huge response.
No response or plugin not firing:
If clicking the button or running the process seems to do nothing at all, ensure that the process is actually triggered.
- Did you bind the form button to the process properly?
- Is the user account you’re using allowed to start that process (permissions)?
- If it’s a form submission, did you set the form’s actions correctly?
- The remedy is to ensure the form data is saved and then use the data for calling API, which typically means using the Form’s built-in integration capability rather than a completely separate process, or introducing a slight delay. But for most straightforward setups, this won’t be an issue.
General troubleshooting tips:
If something’s not working, isolate the components. Use external tools to verify the API itself works with given inputs.
- Use Joget’s debug logs to see detailed output.
- Print out the request and response.
- Tackle one issue at a time: get the authentication working, then the mapping.
Remember, integration often involves two systems sometimes the issue isn’t on Joget’s side at all but with the API service. By systematically checking each part, you’ll resolve most integration issues and get your JSON API calls running smoothly in Joget.
What are the best practices for JSON API integration in Joget?
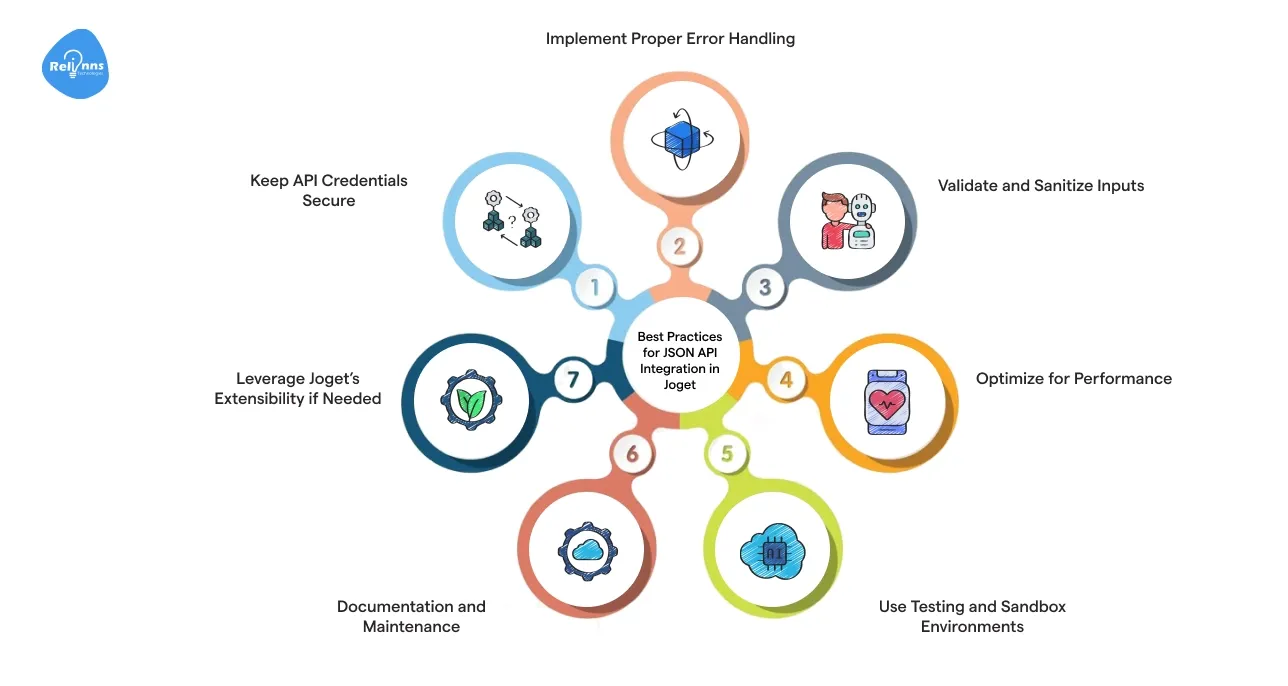
Implementing a JSON API integration is more than just getting it to work you want it to be secure, efficient, and maintainable.
Here are some best practices to consider when working with JSON APIs in Joget.
Keep API credentials secure
- Never hard-code sensitive information like API keys, secrets, or passwords directly into your plugin configuration in plain text.
- Joget allows the use of environment variables or encrypted values.
- Also, limit who has access to Joget’s design console in production environments to prevent unauthorized viewing of such configurations.
- Always use HTTPS for your API URLs to ensure data isn’t sent in plain text over the network.
Implement proper error handling
- At a minimum, log the errors for later review.
- Ideally, create user-friendly messages or fallback behaviors.
- If your workflow can continue without the API data, ensure that an API failure doesn’t completely break the process
- If it does, handle it and allow the process to follow an alternate path
Validate and sanitize inputs
- Just because Joget is low-code doesn’t mean you ignore security fundamentals.
- If you’re using user-provided input in an API call, ensure the input is valid and within expected ranges.
- Joget form builder allows you to add validation. This prevents sending malformed requests.
- JSON APIs might be susceptible to things like SQL injection if you pass raw parameters. Validate it in Joget first.
Optimize for performance
- Each JSON API call adds overhead and latency to your application. Use them judiciously.
- Avoid making redundant calls.
- Caching can be helpful: if the data doesn’t change frequently, you might store the last fetched result.
- Also, consider setting timeouts appropriately so that a hung request doesn’t lock a user’s action for too long.
Use testing and sandbox environments
- When developing your integration, use a sandbox or test environment of the API if one exists.
- Many services offer sandbox keys that hit dummy data.
- This prevents any accidental data changes in real systems during your development and testing.
- Once you move to production, switch to production API endpoints/keys. But even then, test thoroughly with sample data.
Documentation and maintenance
- Document your integration for future maintainers.
- In Joget, use description text to note what each integration does and which API it hits
- Also, keep an eye on the API provider’s updates.
- If they announce changes, you might need to update your Joget app to remain compatible.
Leverage Joget’s extensibility if needed
- If you find that the built-in JSON API tool is not sufficient for a complex scenario, remember that Joget is extensible.
- You can create a custom plugin in Java that perhaps calls the API and processes data in a more complex way.
- This is an advanced move, but Joget’s plugin architecture means you aren’t limited by the out-of-the-box features.
- For most cases, though, the JSON API plugin should suffice.
By following these best practices, you’ll create secure, reliable integrations. A Joget application powered by JSON API and External Service Integration streamlines workflows — automating data exchange, delivering real-time updates, and reducing manual effort.
Always consider the end-user experience and the security implications while designing your JSON API integrations.
Common Use Cases for Joget API Integration
There are countless ways to apply API integration via Joget. To inspire you, here are a few everyday use cases drawn from our real implementations that illustrate its power in business scenarios.
1. Inventory & POS Synchronization
Keeping sales and inventory data in sync is critical for retailers. In one project, we integrated Vend Cloud POS with a Joget-powered inventory system.
- Automated stock deductions after every sale.
- Real-time return tracking pushed directly into Joget.
- Improved inventory accuracy across branches without manual updates.
This eliminated duplicate entries and ensured managers always had live, reliable stock insights.
2. Procurement & Financial Tracking
Finance teams often struggle with reconciling budgets and purchase records across systems. With Oracle NetSuite, we built an integration that:
- Pulled purchase and financial data into Joget.
- Enabled unified cost tracking and vendor reconciliation.
- Delivered real-time budget compliance across procurement workflows.
The result was streamlined approvals and faster financial reporting.
3. Real-Time Alerts & Notifications
Communication is critical when inventory thresholds or workflow bottlenecks occur. By integrating SendGrid with Joget, we enabled:
- Threshold breach alerts for stock shortages.
- Missed delivery notifications via SMS and email.
- Approval status updates based on workflow states.
This kept decision-makers informed instantly and reduced downtime.
4. Supply Chain & Logistics Visibility
Managing multimodal shipments requires end-to-end visibility. For a global supply chain solution, we integrated tools like Google Maps, FourKites, FleetMon, and PlaneFinder into Joget:
- Live route tracking with Google Maps.
- ETA predictions and shipment visibility with FourKites.
- Maritime cargo monitoring via FleetMon.
- Air freight status tracking with PlaneFinder.
Together, these created a unified logistics dashboard with real-time delivery insights.
5. Contract review & compliance automation
Contract management is traditionally manual and error-prone. Using Joget with Vision AI and Custom ATS, we delivered:
- Automated syncing of contracts with employee or applicant profiles.
- AI-driven detection of risky clauses and anomalies.
- A secure Custom DB storing templates, version logs, and audit histories.
This drastically reduced compliance risks while giving legal teams full visibility into contract lifecycles.
These examples scratch the surface of what’s possible.
By leveraging APIs, you remove manual steps and delays: information flows to where it’s needed, and actions in one system can automatically trigger actions in another.
With a bit of creativity, there’s virtually no limit to what you can build through API integrations on Joget, especially when backed by the right strategy and support.
Conclusion:
JSON API integration in Joget opens up a world of possibilities for enhancing your applications. By connecting your Joget apps to external services through JSON API and External Service Integration, you can create far more powerful, data-rich, and automated workflows without writing heavy code.
Always remember to thoroughly test your integrations and handle errors gracefully. Continuous improvement is an integral part of the integration journey: monitor your API usage, identify changes or performance issues early, and refine the setup as needed.
If you're planning to implement JSON API integration using Joget, Relinns is here to help. We specialize in building powerful, low-code applications tailored to your business using Joget’s flexible development environment.
Whether it's enterprise automation or complex system integration, our team ensures your apps are scalable, secure, and future-ready.
Why choose Relinns for your Joget projects?
- Extensive experience delivering custom Joget apps across industries
- Proven track record of secure and scalable API integrations
- Fast deployment with expert low-code development support
- End-to-end services, design, build, test, and maintain
- Dedicated support tailored for enterprises and startups alike
Ready to scale faster and smarter? Get in touch with Relinns today and start building the future.
Frequently Asked Questions (FAQs)
Does Joget support API formats other than JSON?
Yes, Joget also supports XML, form-encoded data, and other formats, though JSON is the most commonly used and recommended format for modern API integration.
Can I connect to multiple APIs in a single Joget application?
Absolutely! You can configure as many API connections as needed within a single Joget application, allowing complex workflows that interact with multiple systems.
Is it possible to schedule API calls rather than triggering them from forms?
Yes, Joget allows you to schedule API calls using the Scheduler feature, enabling regular data synchronization without manual intervention.
How do I handle paginated API responses in Joget?
You can implement pagination handling by using workflow variables to track pagination tokens and creating loops that make multiple API calls to retrieve all data pages.
Can Joget handle webhook callbacks from external systems?
Yes, Joget can be configured to receive webhook calls from external systems by creating custom API endpoints using the API Controller feature.
What security measures should I implement for API integration?
Always use HTTPS, store credentials securely, implement proper authentication, validate input data, and follow the principle of least privilege when configuring API access.
How can I debug API calls that aren't working?
Enable debug logging in Joget, use tools like Postman to test API calls independently, and check both request payloads and response data against the API documentation.